Vegetables
Knowing the exact harvest time for cauliflower 🥬 makes all the difference between a tight, snow-white head and a loose, bitter mess.
Picture this: you’ve spent months nurturing your cauliflower, and now the moment is here. But how do you know it’s really ready? Waiting too long turns those perfect curds into yellow, stringy disappointment.
Timing matters because cauliflower is finicky—too early, and the head isn’t fully formed; too late, and it bolts or turns bitter. The ideal window is when the head is firm, compact, and about 6-8 inches wide, with leaves just starting to yellow at the edges.
In this guide, I’ll walk you through the visual cues to watch for, how weather and variety affect timing, and the best way to harvest without damaging the plant—so you get the tastiest, freshest curds every time.

How to identify the perfect cauliflower harvest time by appearance
Timing your cauliflower harvest is all about reading the plant’s visual cues—because that tight, snow-white head you crave disappears fast once it opens. I’ve learned the hard way that waiting even a day too long turns those perfect curds into loose, bitter florets.
The key lies in observing head size, color consistency, and even the leaf wrapping around the crown. Let’s break down exactly what to look for.
First, check the head diameter. A ready-to-harvest cauliflower should measure between 6-8 inches across. If it’s smaller, it’s not mature enough—those florets will still be loose and underdeveloped.
On the flip side, if the head grows beyond 8 inches, the center may start yellowing or opening, which signals it’s past its prime. I always use a ruler or tape measure for accuracy, especially when growing multiple varieties.
Next, focus on the color uniformity. The head should be fully colored—whether that’s snow-white, purple, or orange—with no pale or green patches. Uneven coloring often means the plant is stressed, possibly from temperature swings or nutrient deficiencies.
My purple cauliflower variety, for example, needs cooler nights to develop its deep hue, or it’ll stay dull and patchy.
Don’t overlook the outer leaves. They should be slightly yellowing at the base but still mostly green. If the leaves are fully green and tightly wrapped, the head isn’t ready. Conversely, if they’re browning or dying back completely, you’ve missed your window.
I’ve seen gardeners pull cauliflower too late because they ignored this subtle clue—leading to tough, fibrous stems and bitter taste.
| Harvest Cue | What to Look For | Action |
|---|---|---|
| Head Size | 6-8 inches in diameter | Harvest now for optimal texture |
| Color | Uniform and fully developed (white/purple/orange) | Check for pale spots or uneven hues |
| Leaf Wrapping | Slightly yellowing at base, not fully green | Pull if leaves are browning or dying |
| Firmness | Head feels solid; stem snaps easily | Gently twist to test readiness |
| Weather Impact | Cooler temps (50-70°F) ideal; heat causes bolting | Harvest early if forecast shows heatwave |
| Variety Matters | Dwarf varieties mature faster (60-70 days) | Check seed packet for specific timing |
Weather plays a huge role in harvest timing. Cauliflower thrives in cool temperatures (50-70°F), and sudden heat can cause it to bolt prematurely or develop loose heads.
I once grew a batch in Southern California’s summer heat and ended up with tiny, bitter florets because the plants shot up too fast. If your forecast calls for a heatwave, harvest early—even if the heads aren’t fully sized—to avoid disappointment.
Your cauliflower variety also affects timing. Dwarf varieties like ‘Snowball Y’ mature in 60-70 days, while larger types like ‘Romanesco’ take 90-100 days. Always check the seed packet for days-to-maturity, but use the visual cues above as your final guide.
I’ve grown both types side by side and noticed the dwarf ones signal readiness with smaller but firmer heads—they’re ready sooner but just as flavorful.
One trick I swear by is the stem twist test. Gently grasp the stem near the base and twist. If it snaps cleanly with minimal resistance, the head is ready. If the stem bends without breaking, it’s not mature enough.
This method works especially well for container-grown cauliflower, where roots are more confined and less forgiving. It’s a quick way to avoid over-maturing heads in tight spaces.
Finally, watch for secondary heads. After harvesting the main curd, some varieties—like ‘Purple of Sicily’—will produce smaller side shoots in the leaf axils. These are edible but often less flavorful. I’ve found they’re best used in stews or purees rather than fresh eating.
If you’re growing cauliflower for main heads only, pull the whole plant once the primary head is harvested to redirect energy.
Remember, harvesting at the right time isn’t just about taste—it’s about encouraging regrowth in some varieties and preventing pests like cabbage moths, which target stressed or overripe heads.
The sooner you harvest, the cleaner your garden stays. Now grab those shears and enjoy the crunch of perfectly timed cauliflower! 🥬
Step-by-step guide to harvesting cauliflower without damaging the plant
Once your cauliflower reaches the perfect harvest time, knowing how to cut it properly ensures you get the tightest, freshest curds without stressing the plant. A sharp, clean cut prevents disease and even encourages a second harvest in some varieties.
The key is speed and precision—cauliflower heads can yellow or bolt within hours if left unattended.
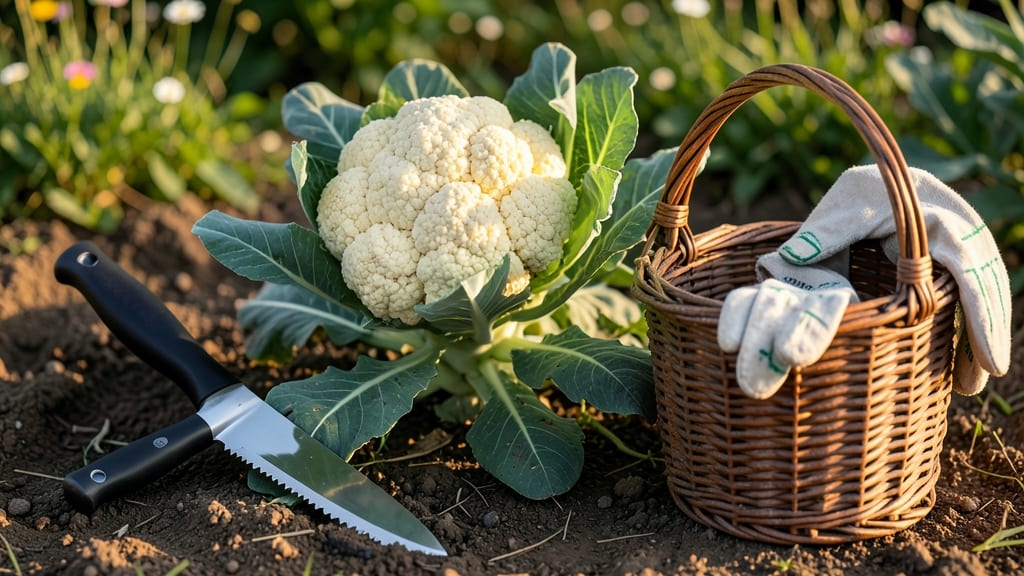
Start by gathering your tools: a clean, sharp knife or pruning shears, garden gloves, and a bucket of cool water to store your harvest. Work on a dry, sunny morning to reduce stress on the plant and preserve quality.
If you’re harvesting multiple heads, prioritize the most mature ones first to avoid overcrowding.
✂️ Step-by-Step Harvesting Guide
- Step 1: Check Readiness – Confirm the head is 6-8 inches wide, firm to the touch, and leaves are slightly yellowing at the base. The stem should snap easily when twisted gently.
- Step 2: Wear Gloves – Put on garden gloves to protect your hands from the plant’s prickly leaves and sap, which can irritate skin.
- Step 3: Cut at the Base – Hold the head firmly and make a clean, diagonal cut about 1-2 inches below the head using a sharp knife. Avoid tearing the stem.
- Step 4: Handle Gently – Place the harvested head in a bucket of cool water immediately to maintain crispness. Avoid stacking heads to prevent bruising.
- Step 5: Post-Harvest Care – If your variety is self-blanching (like Romanesco), you may get a second harvest in 2-3 weeks. For others, remove the entire plant to redirect energy.
- Step 6: Store Properly – Wrap the head in a damp paper towel and store in the fridge for up to 5 days or freeze for longer storage.
After harvesting, inspect the remaining plant for signs of pests or disease. Remove any yellowed or damaged leaves to improve airflow and reduce future issues.
If you’re growing a variety like Romanesco or Purple Cauliflower, you might see a second head forming in the center—just repeat the process when it matures!
Pro tip: If your cauliflower heads start to yellow or open prematurely, it’s often due to heat stress or over-maturity. Next time, harvest earlier or provide afternoon shade to delay bolting. A well-timed harvest rewards you with the sweetest, most tender curds for your recipes.
For container-grown cauliflower, the process is the same, but be extra gentle to avoid disturbing nearby plants. After harvesting, reduce watering slightly to help the plant focus on any remaining side shoots. With the right technique, you’ll turn your garden into a cauliflower powerhouse all season long!